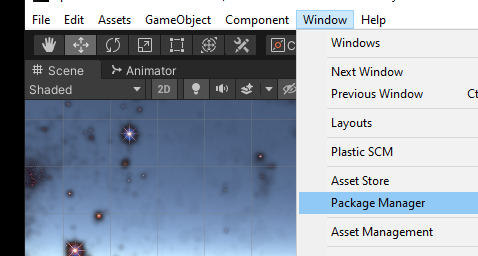
Opening the Unity Package Manager
From the Unity menu, Window — Package Manager opens the list of what’s available.
Waiting to load
This example is using an older version of Unity, so the Post Processing version available (3.2.2) mentioned “2019.4 verified” (the latest version is not).
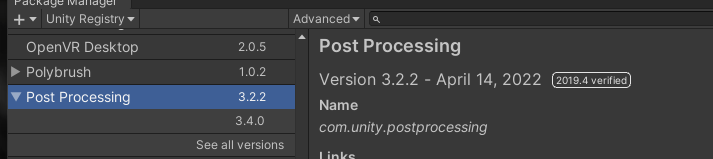
Post Processing version verified
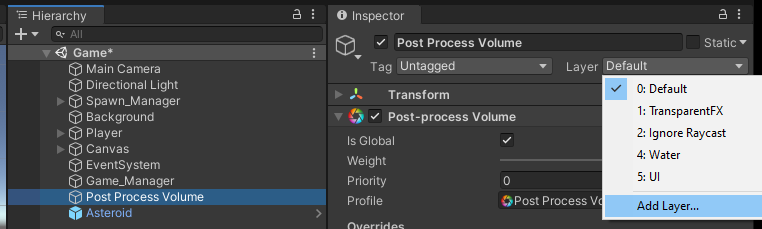
After installation, create a Post Processing Profile, an Empty Object named “Post Proces Volume”:

Created Empty with name “Post Process Volume”
Add a component of Type “Post-process Volume”
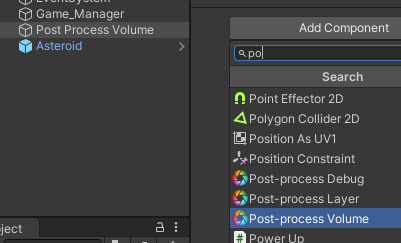
Add Component Post-process Volume
Checkmark “Is Global” to open access to profile settings
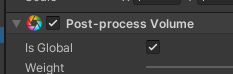
Is Global checkmarked
Next is to click “New” to create the Profile (named “Post Process Volume”). Weight “1” and Priority “0” are enough for the game with one profile.
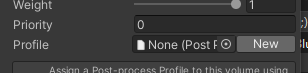
Profile “New” button
The added profile appears listed in Assets — Scenes — Game_Profiles.
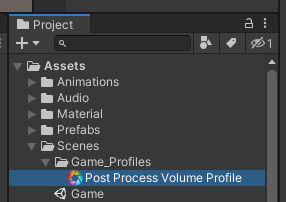
New Post Process in Scenes
With the Empty object and Profile, now effects can be added.
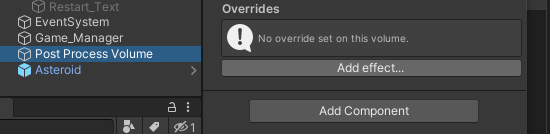
Hierarchy Post Process Volume ready for effects
Post processing is like adding photoshop effects to the game. The “Bloom” is especially big.
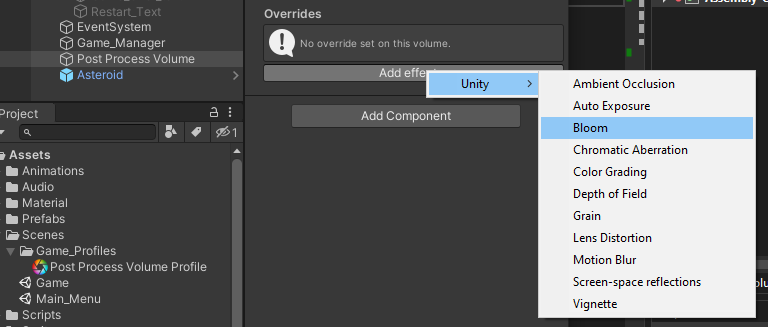
Choosing the Bloom effect
The game’s Main Camera (Hierarchy) applies effects to materials.
(a) Turn Bloom “On”
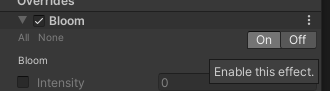
Enable Bloom
(b) To visualize an Example, checkmark all Bloom and Dirtiness parameters.
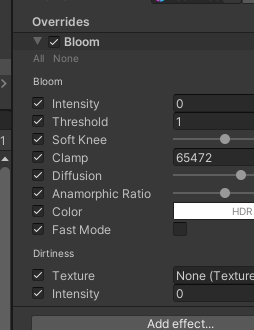
All checkmarked
(c) Highlight Main Camera and (c) Add component “Post Process Layer.”
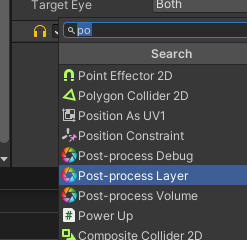
Main Camera add component
(d) Set up a new layer for the camera. The component starts with none.
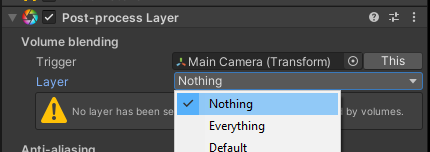
No layer picked for camera
Highlight Hierarchy — Post Process Volume, click on drop down of Inspector — Layer.
Adding a new Layer in the Inspector
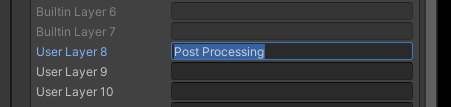
From the numbered choices, pick and name a layer “Post Processing.”
Naming new layer
Now a “Post Processing” appears in the list of Main Camera — Post-process Layer — Volume blending — Layers.
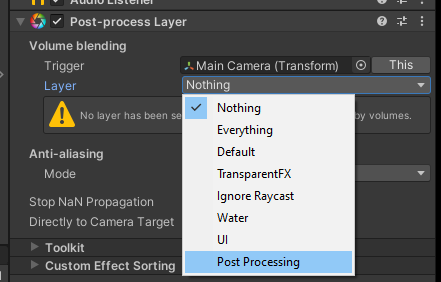
Custom new layer appears in list of choices
(e) Highlight the Hierarchy — Post Process Volume and also set the layer
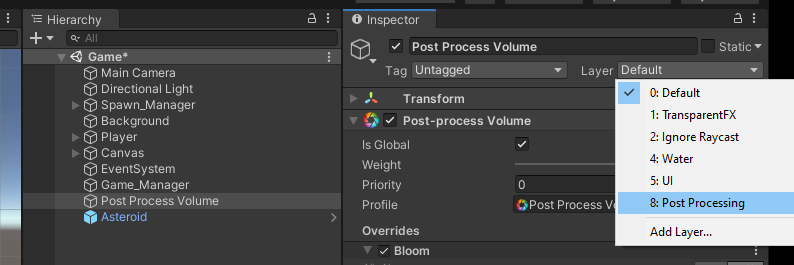
Post Process Volume’s Post Processing layer
Save. Wait. Click “On” in the Bloom effects
Now the Bloom Parameters can be adjusted and evaluated as they show on the Game and Camera views of the Editor.
Bloom
Here is Bloom — Intensity zero (0):
Camera view with Bloom Intensity zero
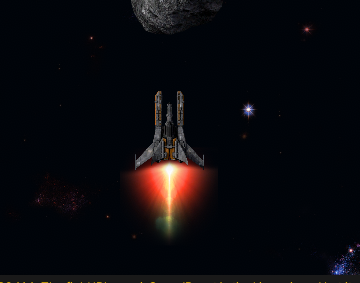
Here is a higher Bloom — Intensity. Notice how the dim stars appear brighter:

Camera view with higher intensity
Color Grading
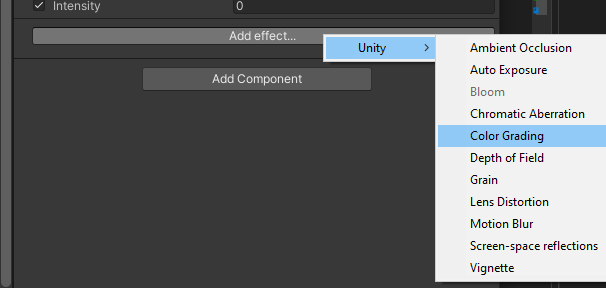
Post Process effect Color Grading
Checkmark all the Color Grading parameters. Check a few values: Mode “High Definition Range” (HDR). To use HDR, Linear needs to be used. There is a warning “Color Space in projet settings is set to Gamma…”
To use HDR, switch from Gamma to Linear. Open Build Settings from the File menu.
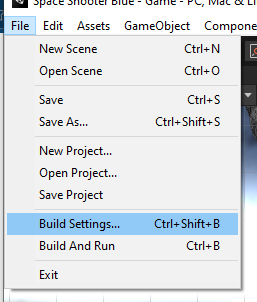
Open Build Settings
Open Build Settings — Player Settings:
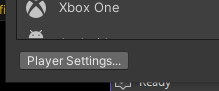
Build Settings — Player Settings
In Project Settings — Player click the drop down “Other Settings”
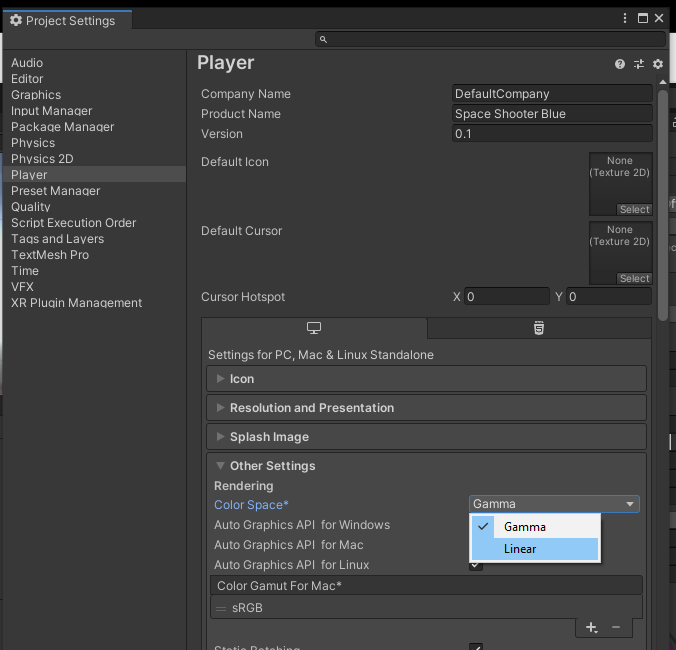
Project Settings — Player — Other Settings — Color Space
Wait for the installation
Importing new Build Settings
Changing the Build Settings signals a recompile with the new settings. The Gamma warning disappears. Close the Build window with the ‘X’ top right.
Tonemapping — Mode, change from “None” to “ACES” which is can look as film.
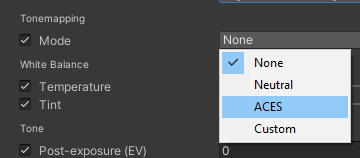
Tonemapping — Mode — ACES
The White Balance — Temperature and Tint can alter the view from cold blues to warm colors.