First action: Laser hits enemy ship.
Animation is an explosion at location of enemy. Enemy ship prefab is destroyed, Animation does not loop.
(a) Open Game Scene, double click on Assets scene.
(b) Open up an enemy prefab in Prefabs view
(c) Open an Animation frame and Create and Save an Enemy_Destroyed_anim in the Animations folder using the sprites.
Click the record button, Drag and drop all the Sprite images into the DopeSheet, Click record (stop). Play the animation to see the visual on the Enemy object in the Prefabs view.
Somewhere during the animation, the Enemy object is covered up and not visible.
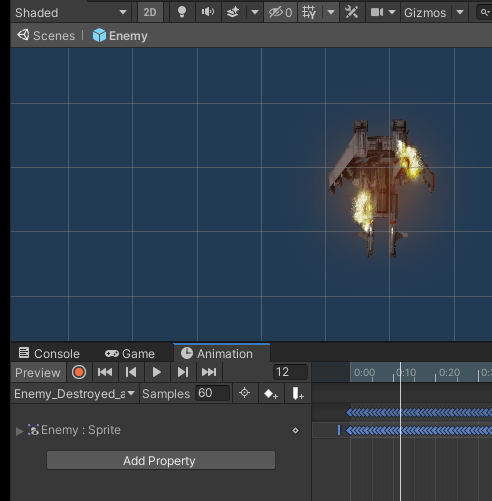
Opening frames of enemy destroy animation
Exit the Prefabs view with a click on the corner arrow ‘<’.
Arrow to exit
Save and Run. The animation runs with each spawned Enemy, starting at the time of spawning. By Default, Unity wants to loop an animation.
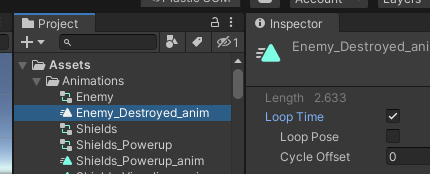
Default Loop Time box checked On
Uncheck the Loop Time box to stop looping.
Double click the Assets — Animations — Enemy controller (the controller, not the animation) to see the Controller view. Maybe also right click and rename “Enemy” to “Enemy_Destroyed” to match the naming convention of the other controllers.

Enemy animation controller view
The orange Enemy_Destroyed_anim is colored orange to mean “run on start.” As long as the object is active, the animation plays (except no more looping)
Create an Empty State in the controller to go between the Entry and the Animation. Right click in the view and pick “Create State — Empty.” Double click on the “New State” button and enter a name, “Empty”
Right click on “Empty” and set as Default State.
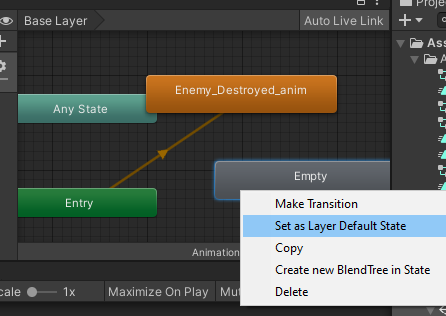
Set Empty as default state
Empty is now orange color, Enemy_Destroyed_anim is now gray color.
Animation Transition with Parameters
Right click and Make Transition from Empty. Click for the arrow to appear, Click on Enemy_Destroyed_anim to connect.
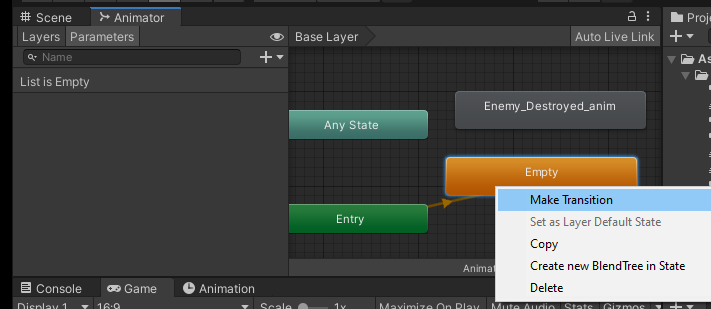
Make transition from Empty to an animation
With a transition from Empty to Enemy_Destroyed_anim, the game runs with spawn, play Empty, play Enemy_Destroyed_anim.
Click of the Parameters tab to add behavior to the transition, top left next to the Layers tab.
Layers is for multiple animations held layers deep.
Trigger applies to when set On. Click the ‘+’ icon and choose “Trigger” from the menu of Float, Int, Bool.
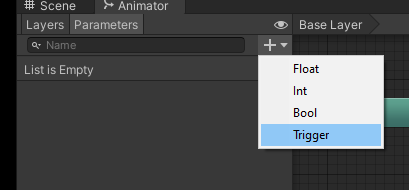
Add a trigger parameter
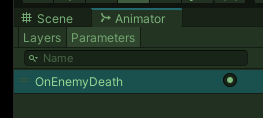
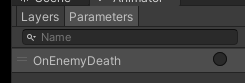
In this example, the parameter name is OnEnemyDeath.
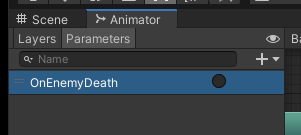
Naming new trigger parameter
Click on the transition line, line with arrowhead in it, to view the Inspector — Transitions— Conditions — List Is Empty. (line changes to color blue)
Click the ‘+’ to add a method from a list. OnEnemyDeath is picked (only trigger in list)
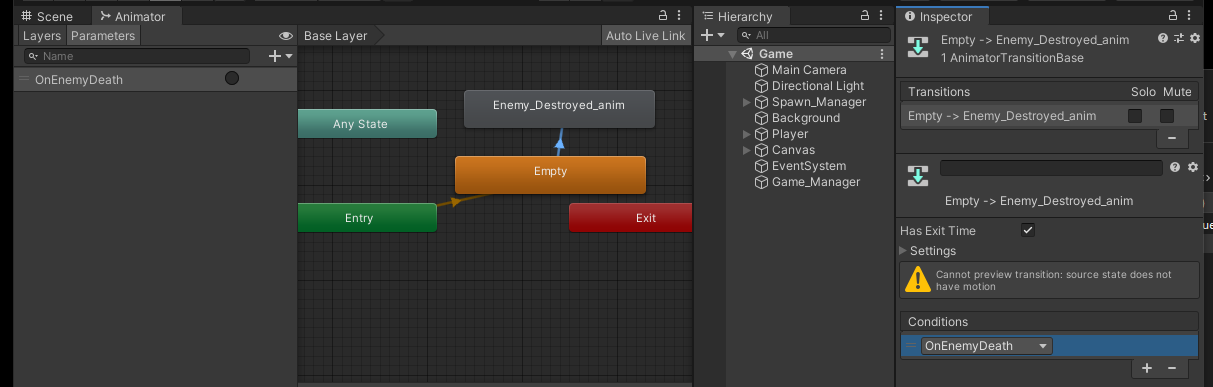
Added OnEnemyDeath trigger to Settings — Conditions
Save and run.
The button next to Parameters — OnEnemyDeath toggles on and off. When On, ALL enemy objects in the game run Empty and then Enemy_Destroyed_anim when they spawn.
Trigger set to On
Next adjust trigger to run on an enemy object after hit by a laser.
From the Unity Scripting API:
Animator.SetTrigger
Declaration: public void SetTrigger(string name);
Declaration: public void SetTrigger(int id);
Parameters: nameThe parameter name.idThe parameter ID.
Description: Sets the value of the given trigger parameter.
Animator is the Component. (a) Create a handle (reference) for the Animator component of the hit enemy.
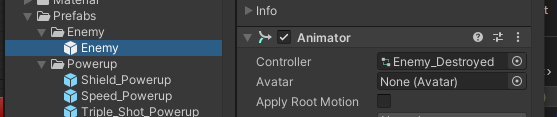
Animator component of Enemy object
The Enemy (Script) with value is grayed out. Script behavior acts on the one Enemy prefab after instantiation.

Enemy Script parameter grayed out
Locate the enemy.cs script. If hidden, there is a dropdown icon in Visual Studio.
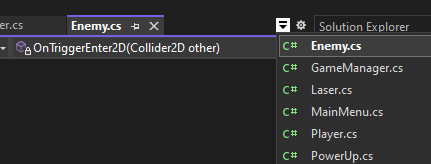
Dropdown icon in Visual Studio
Create reference for Animator component.
using UnityEngine;
public class Enemy : MonoBehaviour
{
...
    [SerializeField]
    private Animator _animator;
    void Start()
    {
...
        _animator = GetComponent();
        if( _animator == null )
        {
            Debug.LogError("Animator is NULL");
        }
    }
    private void OnTriggerEnter2D(Collider2D other)
    {
...
        _animator.SetTrigger("OnEnemyDeath"); // start explosion animation
    }
}
In the Unity Editor, highlight the Enemy prefabs asset, drag and drop the Inspector — Animator component to the Enemy (Script) — Anim variable contents. This is an internal component to component assignment within the same prefab object.
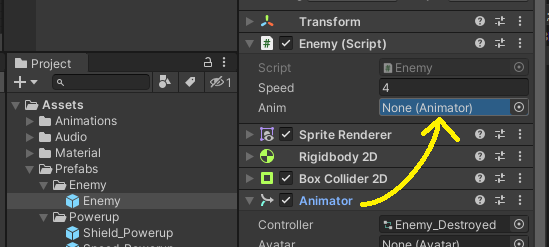
Drag Animator to _anim variable
Save and run to verify _anim assignment to an Animator object. With the Trigger “OnEnemyDeath still checked ‘On’ in the Controller screen, the scene run should run the empty-then-explode animation with each spawned enemy ship.
Switch the OnEnemyDeath to ‘off’. This means default start in state ‘off.’
Trigger turned off
Next allow a time delay for enemy objects to run the animation before removal with “this.Destroy();” using the added “float: delay” parameter.
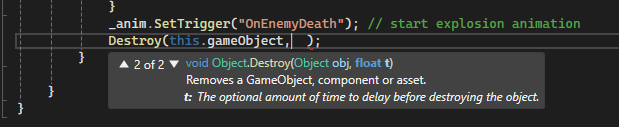
this.Destroy() with time delay
Add the amount of time for the animation. Take a look at the Animation view.

Animation for Enemy lasting 2 1/2 seconds
Now the delayed destruction should allow the enemy explosion to play out.
public class Enemy : MonoBehaviour
{
...
    [SerializeField]
    private Animator _animator;

    private void OnTriggerEnter2D(Collider2D other)
    {
        if (other.tag == "Player")
        {
...
            _animator.SetTrigger("OnEnemyDeath"); // start explosion animation
            Destroy(this.gameObject, 2.8f );
        }
        if (other.tag == "Laser")
        {
...
            _animator.SetTrigger("OnEnemyDeath"); // start explosion animation
            Destroy(this.gameObject, 2.8f  );
        }
    }
}
Next is to
(a) stop the enemy object from colliding after the initial hit.
(b) eliminate the time delay from the OnTriggerEnter2D() to the Enemy_Destroyed_anim.
Part (a) can be done by stopping motion of enemy object, easier than removing components or turning off the collision component.
    public class Enemy : MonoBehaviour
{
    [SerializeField]
    float _speed = 4.0f;
...
            _speed = 0;
            Destroy(this.gameObject, 2.8f );
...
}
At first, an default starting Empty animation was added with a transition to the Enemy_Destroyed_anim to prevent the Enemy prefab objects from exploding when spawning.
The Empty animation does not have a timing, but the transition does: 0.75 + 0.25 delay.
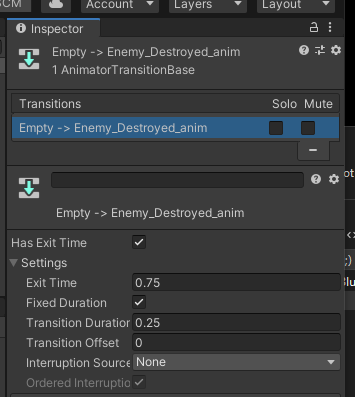
Transition with default timings
“Transition Duration” applies to a transition that blends the two connected animations together. Set to zero in this example.
Uncheck “Has Exit Time”.
Save changes.
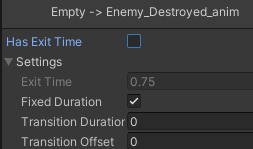
Adjustments to Transition
Dealing with the Error: Animator._anim is null.
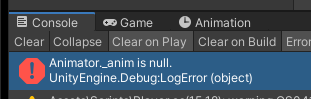
Animator._anim is null Error
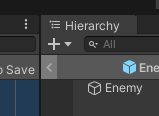
Typing “enemy” into the Hierarchy Search bar returns two results:
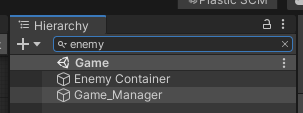
Type “enemy” into search bar
After a click on the Game_Manager object, the Inspector shows two scripts — both “Enemy (Script)” and “Game Manager (Script).”
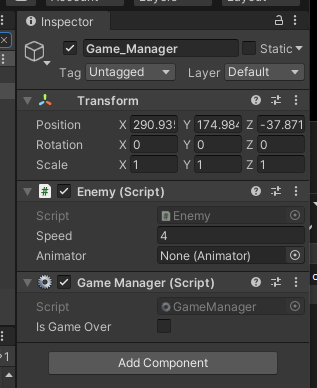
Two Scrips present
Delete the “Enemy (Script)” from the Game_Manager.