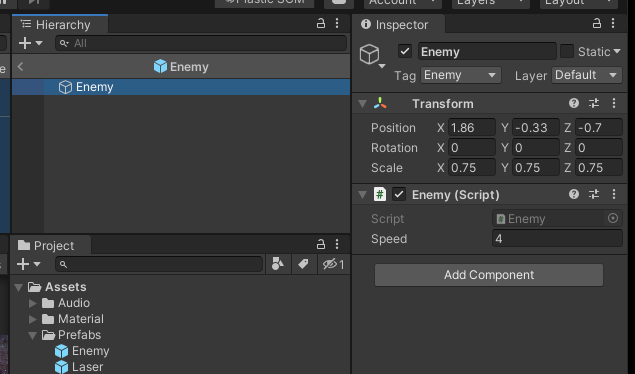
Objects with Scripts can be duplicated and the script is dragged to the new copy. Assets without Scripts, such as backgrounds can be fine-tuned for color, size and layer in the inspector. The Prefab Enemy needs an extra last step ‘(j)’ to change C# code from OnTriggerEnter() to OnTriggerEnter2D().
GameObject with Script and a Prefab
In this example, use the artistic 2D “Player Turn Left0000” to replace a cube named “Player” which has a with a script and a Prefab named “Laser.” Next a cube named “Enemy,” a Prefab is replaced. The Prefab Laser changes are last.
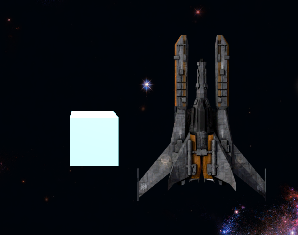
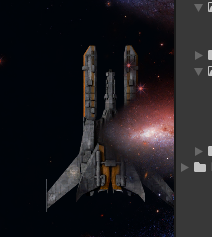
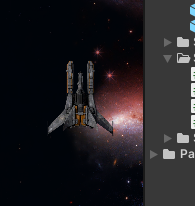
Player 2D on right to replace 3D cube
The Player
The player cube’s components are expendable except for the Script. The Script sets the starting position (Transform) and contains the [SerializeField] of the Laser Prefab with it’s assigned Laser.
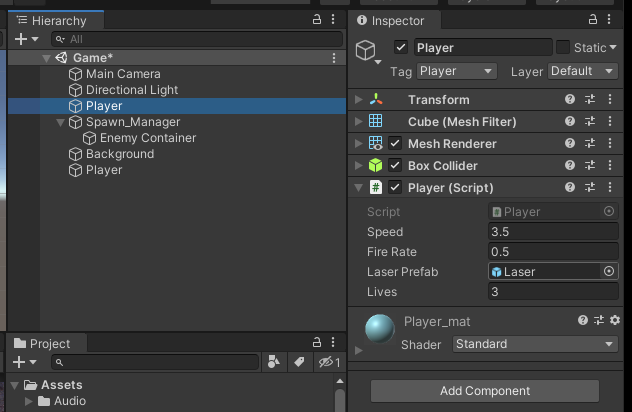
Player 3D components including Script
(a) highlight the 2D Player to access its Inspector.
(b) rename the “2D Player Turn Left0000" to “Player”.
(c) click and drag the 3D Player Script onto the Inspector to add the component.
(d) click and drag the 3D Player Prefab onto the 2D Player’s “Laser Prefab”.
(e) Delete 3D Player.
(f) Tag 2D as “Player” same as 3D before.
(g) Save and Run to adjust size and layer appearance using the inspector.
(h)(i) apply to both Player and Enemy details below — Rigidbody, Box Collider.
Details
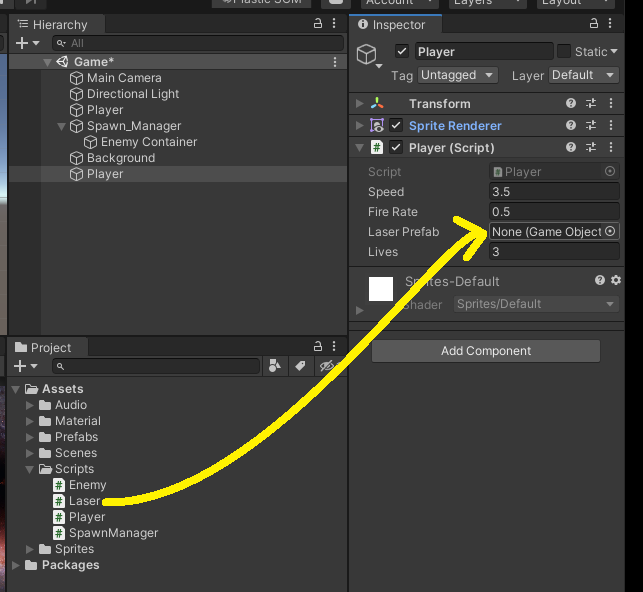
Drag Laser Prefab after adding Player Script
Delete 3D Player, to make Tag available.
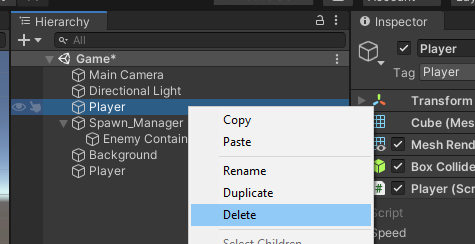
Delete 3D Player
Add “Player” Tag from list for new 2D Player object
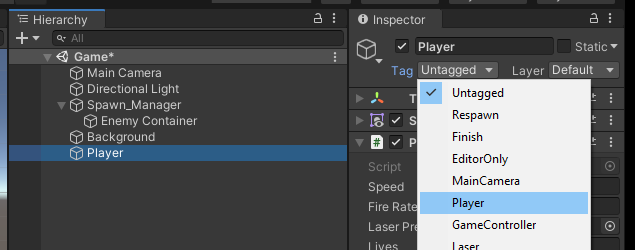
2D Player with Player Tag
Save and Run game to verify copy from 3D to 2D, then adjust for size and layer in Game view.
Game view before Adjustment
After adjustment to Foreground layer, and reduced scale size.
Size and Foreground Layer after adjustments
Save and Run. Now move to convert each remaining 3D to a 2D object. The 2D objects do not have colliders with 3D objects.
Adding the Rigidbody 2D and Box Collider is the same for both Player and Enemy, except as a Prefab edited in the Hierarchy, apply Overrides afterward for the Enemy Prefab.
The Enemy
The Enemy Prefabs does not have an object in the Hierarchy to copy. but highlight the Prefabs Enemy and click on the “Open Prefab” in the Inspector.
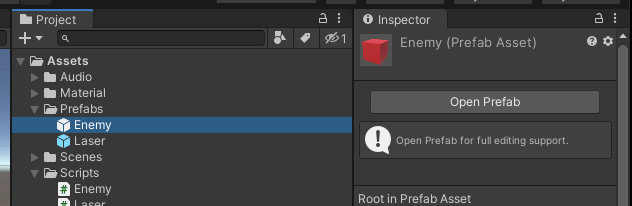
Enemy in Assets with “Open Prefab” in Inspector
(a) Highlight Prefabs — Enemy.
(b) Click Open Prefab.
(c) Click on 3-dot icon (or right click) and “Remove Component” of unnecessary 3D Components.
(d) Add 2D components.
(e) Drag new looking Sprite to Sprite box.
(f) Adjust correct layer (foreground).
(g) Save and Run to adjust size.
(h) add 2D Collider and 2D Rigidbody components
Details
Remove 3D Cube (Mesh Filter), Mesh Renderer, Box Colider, Rigidbody:
Enemy Prefab after removing 3D components
Next to turn into a 2D object (a Sprite), Add Component for Sprite Renderer.
Add Component Sprite Renderer
The Sprite Renderer asks for a Sprite, so with Enemy Highlighted, drag and drop the content over to the Sprite box.
Drag and drop Enemy content to Sprite box
Adjust correct layer in front of background (foreground Sorting Layer)
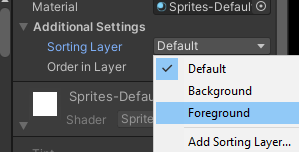
Adjust enemy sprite to Foreground
Save and Run to adjust best size.
(h) Rigidbody 2D and (i) Collider 2D for Player and Enemy
Highlight Enemy, add components. Highlight Player, add components
Add Component — Rigidbody 2D. Lower Rigidbody 2D — Gravity Scale — to zero.
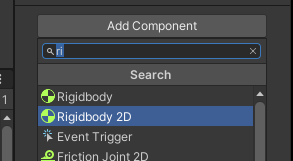
Add Component — Rigidbody 2D
Add Component — Box Collider 2D (type box into search)
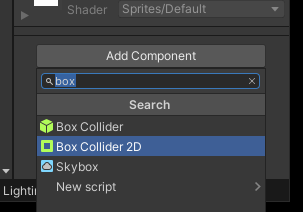
Add Component — Box Collider 2D
Checkmark the “Is Trigger” box, and click the icon beside “Edit Collider” to shrink collider area close to the Enemy object, close to the Player object.
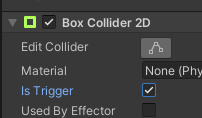
Checkmark “Is Trigger”
Overrides
If edits to Enemy are made in the Hierarchy, then click “Overrides All” in the Inspector.
(j) Change C# code for Enemy
    private void OnTriggerEnter(Collider other)  // 3D method

    private void OnTriggerEnter2D(Collider2D other) // 2D method
Laser changes from 3D to 2D
The Laser in this example is built as 2D from scratch.
(a) Delete 3D prefab laser (the prefab, not the script).
(b) Locate the 2D asset and drag and drop into the Hierarchy. Change Object name
(c) Update layer to foreground.
(d) Scale to size.
(e) Add Box Collider component. Edit Collider size.
(f) Add Rigidbody2D. Change Gravity Scale to zero (0). Click Overrides All
(g) Add Laser Script component.
(h) Recreate laser as Prefab. Highlight in Hierarchy. Drag and drop to Asset — Prefabs. Delete laser in Hierarchy. Highlight laser and click “Open Prefab” to view and edit components in the Inspector.
(i) Highlight Player in the Hierarchy. Add laser to Player (Script) — Laser Prefab box.
(j) Checkmark “Is Trigger” in Box Collider for laser, Player, and Enemy.
(k) Reposition to tip of Player. Run game, fire and pause to adjust objects. Place Player at position 0,0,0, then move laser to top of Player, about 0,1.05,0. Make correction in Player script:
private Vector3 _laserStart = new Vector3(0, 1.05f, 0); // position above Player object
(l) Tag name “Laser” to prefab object “laser”.
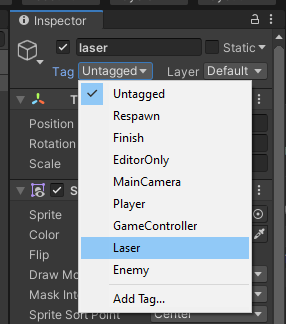
Tag Laser name to object