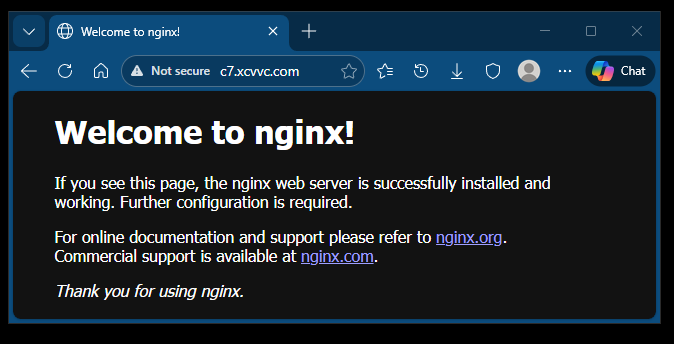
After successful installation, the NGINX server is unsecure.
What to do after you have a certificate
•CSR (Certificate Signing Request): also named CSR Code, Download CSR, generated with Private Key, the .csr file, text starts with "BEGIN CERTIFICATE REQUEST"
•Private Key (sent via email), the private_key.pem format file, .key file, your_domain_name.com.key file
•Certificate (CRT): also named Download Certificate, actual SSL Certificate Code, The root certificate, the .crt format file, a leaf certificate, ,pub-key.pem format file, your_leaf_certificate.crt file, text begins with "BEGIN CERTIFICATE"
•Intermediate/Chain files: also named Download Intermediate/Chain, cross-signed certificate, the .ca format file, ca-chain.pem file, your_intermediate_chain.crt file, text begins with "BEGIN CERTIFICATE"
•PEM: also named Download PEM, CA Bundle code, contains the root and intermediate CA certificates, the .ca-bundle format file, the .pem file, the full-chain.pem file, text is the .crt + .ca files.
https://www.ssldragon.com/how-to/install-ssl-certificate/nginx/
Have the certificates available:
• Your primary certificate (.crt file)
• The root and intermediate certificates (.ca-bundle file)
You can make the combination manually using a text editor. The order of SSL certificates is important.
1. Your primary certificate for your domain name
de.somewhere.com.crt
2. Intermediate certificates
de.somewhere.com.ca (first half)
3. Root certificate
de.somewhere.com.ca (second half)
Or you can combine the certificates from separate files:
cat de.somewhere.com.crt intermediate.crt root.crt > ssl-bundle.crt
If your intermediate and root certificates are inside a single file with .ca-bundle extension, run:
cat example_com.crt bundle.crt > ssl-bundle.crt
	cat de.somewhere.com.crt de.somewhere.com.ca > ssl-bundle.crt
For Windows, use the "type” command
C:\Users\you\Documents\ssl certs>dir
 Volume in drive C has no label.
 Volume Serial Number is 0B6C-6190

 Directory of C:\Users\you\Documents\ssl certs

01/17/2026  08:18 PM              .
01/17/2026  08:18 PM              ..
01/17/2026  08:17 PM             6,680 de.somewhere.com.ca
01/17/2026  08:13 PM             2,305 de.somewhere.com.crt
01/17/2026  08:15 PM              old b4 2025
               2 File(s)          8,985 bytes
               3 Dir(s)  121,397,415,936 bytes free

C:\Users\you\Documents\ssl certs>cat de.somewhere.com.crt de.somewhere.com.ca > ssl-bundle.crt
'cat' is not recognized as an internal or external command,
operable program or batch file.

C:\Users\you\Documents\ssl certs>type de.somewhere.com.crt de.somewhere.com.ca > ssl-bundle.crt
Save the new, combined file in the SSL directory of your NGINX server.
Put the ssl-bundle.crt file into the SSL directory of the NGINX server.
Do I have sftp?
From the Windows terminal:
C:\Users\you\Documents\ssl certs>sftp you@de.somewhere.com
you@de.somewhere.com's password:
Connected to de.somewhere.com.
sftp>
Put (send, upload) the file to the destination working directory
sftp> put ssl-bundle.crt
Uploading ssl-bundle.crt to /home/x/ssl-bundle.crt
ssl-bundle.crt                 100% 8985   219.4KB/s   00:00
sftp> quit

C:\Users\you\Documents\ssl certs>
‘q’ doesn’t exit.
you@de:~$ ls
you@de:~$ ls
ssl-bundle.crt
you@de:~$
Upload the file to the Server.
C:\Users\you\Documents\ssl certs>sftp you@de.somewhere.com
you@de.somewhere.com's password:
Connected to de.somewhere.com.
sftp> put de.somewhere.com.key
Uploading de.somewhere.com.key to /home/x/de.somewhere.com.key
de.somewhere.com.key               100% 1736    41.4KB/s   00:00
sftp> quit

C:\Users\you\Documents\ssl certs>
View and check the file (check the encoding) on the Server.
you@de:~$ more de.somewhere.com.key
-----BEGIN PRIVATE KEY-----
MIIEvwIBADANBgkqhkiG9w0BAQEFAASCBKkwggSlAgEAAoIBAQDxq6drVqiolEIG
uqbRjoT0XC9RRMCfSYyG/ODM6Jqr1hgDqQz6iDMUdCdcrLmuAKmioHmzwSUFugNK
...
bMQOa9zRtc6QWIdlNp2ROMIqeZlBIcrNA/dVPxJ2uEtHdUdW25EJ8wSkXc3oGoYk
KVtdg9rIQtNQ+Luz9ZgKJ8AJXw==
-----END PRIVATE KEY-----
you@de:~$
Move two files to directories.
From the Google AI overview:
Certificates ( .crt, .pem files): /etc/ssl/certs/
Private Keys ( .key files): /etc/ssl/private/
Use -al to view and note the directory access
you@de:~$ ls -al /etc/ssl/
total 48
drwxr-xr-x  4 root root  4096 Jan 16 19:14 .
drwxr-xr-x 78 root root  4096 Jan 17 18:09 ..
drwxr-xr-x  2 root root 20480 Aug 19 11:08 certs
-rw-r--r--  1 root root 12411 Jul 12  2025 openssl.cnf
drwx------  2 root root  4096 Jul 12  2025 private
you@de:~$
Before:
you@de:~$ sudo ls -l /etc/ssl/private/
total 4
-rw-rw-r-- 1 x x 1736 Jan 18 12:16 de.somewhere.com.key
you@de:~$
Make the change:
you@de:~$ sudo chown root:root /etc/ssl/private/de.somewhere.com.key
you@de:~$ sudo chmod 600 /etc/ssl/private/de.somewhere.com.key
you@de:~$
After:
you@de:~$ sudo ls -l /etc/ssl/private/
total 4
-rw------- 1 root root 1736 Jan 18 12:16 de.somewhere.com.key
you@de:~$
Move the bundle certificate, rename with .pem to not confuse with .crt security file.
you@de:~$ sudo mv ssl-bundle.crt /etc/ssl/certs/de.somewhere.com.pem
you@de:~$
Before:
you@de:~$ sudo ls -l /etc/ssl/certs/de.somewhere.com.pem
-rw-rw-r-- 1 x x 8985 Jan 18 11:57 /etc/ssl/certs/de.somewhere.com.pem
you@de:~$
Make the change:
you@de:~$ sudo chown root:root /etc/ssl/certs/de.somewhere.com.pem
you@de:~$ sudo chmod 644 /etc/ssl/certs/de.somewhere.com.pem
you@de:~$
After:
you@de:~$ sudo ls -l /etc/ssl/certs/de.somewhere.com.pem
-rw-r--r-- 1 root root 8985 Jan 18 11:57 /etc/ssl/certs/de.somewhere.com.pem
you@de:~$
For /etc/ssl/private, permissions of 710 (drwxr-x---) (owner root, group ssl-cert) are common and secure in Debian, and
755 (drwxr-xr-x) is standard for /etc/ssl/certs
Before:
you@de:~$ sudo ls -l /etc/ssl
total 40
drwxr-xr-x 2 root root 20480 Jan 18 13:17 certs
-rw-r--r-- 1 root root 12411 Jul 12  2025 openssl.cnf
drwx------ 2 root root  4096 Jan 18 12:58 private
you@de:~$
Here is that command:
sudo chown root:ssl-cert /path/to/your/ssl_file.
But:
you@de:~$ sudo chown root:ssl-cert /etc/ssl/private
chown: invalid group: ‘root:ssl-cert’
you@de:~$
Nginx configuration
At the end of the configuration file /etc/nginx/nginx.conf is the line:
http {
...
        include /etc/nginx/sites-enabled/*;
}
There are two directories:
/etc/nginx/sites-available/
# Virtual Host configuration for example.com
#
# You can move that to a different file under sites-available/ and symlink that
# to sites-enabled/ to enable it.
#
In the “sites-enabled” directory we will unlink the current .conf file in use, and create a link to the new .conf file needed.
As examples, a .conf file to send port 3000 traffic to node.js, to send other ports to MariaDB, or to Tornado (Python)
Here is the sites-available directory with two configuration files:
you@de:~$ ls -l /etc/nginx/sites-available/
total 8
-rw-r--r-- 1 root root 2412 Aug 29 07:10 default
-rw-r--r-- 1 root root 2817 Jan 18 22:56 with-ssl.conf
you@de:~$
you@de:~$ ls -l /etc/nginx/sites-enabled/
total 0
lrwxrwxrwx 1 root root 34 Aug 29 08:28 default -> /etc/nginx/sites-available/default
you@de:~$
##
# You should look at the following URL's in order to grasp a solid understanding
# of Nginx configuration files in order to fully unleash the power of Nginx.
# https://www.nginx.com/resources/wiki/start/
# https://www.nginx.com/resources/wiki/start/topics/tutorials/config_pitfalls/
# https://wiki.debian.org/Nginx/DirectoryStructure
#
# In most cases, administrators will remove this file from sites-enabled/ and
# leave it as reference inside of sites-available where it will continue to be
# updated by the nginx packaging team.
#
# This file will automatically load configuration files provided by other
# applications, such as Drupal or Wordpress. These applications will be made
# available underneath a path with that package name, such as /drupal8.
#
# Please see /usr/share/doc/nginx-doc/examples/ for more detailed examples.
##
# Default server configuration
#
server {
        listen 80 default_server;
        listen [::]:80 default_server;

        # SSL configuration
        #
        # listen 443 ssl default_server;
        # listen [::]:443 ssl default_server;
        #
        # Note: You should disable gzip for SSL traffic.
        # See: https://bugs.debian.org/773332
        #
        # Read up on ssl_ciphers to ensure a secure configuration.
        # See: https://bugs.debian.org/765782
        #
        # Self signed certs generated by the ssl-cert package
        # Don't use them in a production server!
        #
        # include snippets/snakeoil.conf;

        root /var/www/html;

        # Add index.php to the list if you are using PHP
        index index.html index.htm index.nginx-debian.html;

        server_name _;

        location / {
                # First attempt to serve request as file, then
                # as directory, then fall back to displaying a 404.
                try_files $uri $uri/ =404;
        }

        # pass PHP scripts to FastCGI server
        #
        #location ~ \.php$ {
        #       include snippets/fastcgi-php.conf;
        #
        #       # With php-fpm (or other unix sockets):
        #       fastcgi_pass unix:/run/php/php7.4-fpm.sock;
        #       # With php-cgi (or other tcp sockets):
        #       fastcgi_pass 127.0.0.1:9000;
        #}

        # deny access to .htaccess files, if Apache's document root
        # concurs with nginx's one
        #
        #location ~ /\.ht {
        #       deny all;
        #}
}
# Virtual Host configuration for example.com
#
# You can move that to a different file under sites-available/ and symlink that
# to sites-enabled/ to enable it.
#
#server {
#       listen 80;
#       listen [::]:80;
#
#       server_name example.com;
#
#       root /var/www/example.com;
#       index index.html;
#
#       location / {
#               try_files $uri $uri/ =404;
#       }
#}
Make changes in with-ssl.conf file to accept port 443 https
server {
        listen 80 default_server;
        listen [::]:80 default_server;

        listen 443 ssl;
        #ssl on; (for releases before 1.15.0);
        ssl_certificate /etc/ssl/certs/de.somewhere.com.pem;
        ssl_certificate_key /etc/ssl/private/de.somewhere.com.key;
        server_name de.somewhere.com;
#      access_log /var/log/nginx/access.log;		unresolved error
# 1640172#1640172: invalid log level "root" in /etc/nginx/sites-enabled/with-ssl.conf:48
#      error_log /var/log/nginx/error.logo

        root /var/www/html;
        # may need to add root /var/www/de.somewhere.com/html; later

        # Add index.php to the list if you are using PHP
        index index.html index.htm index.nginx-debian.html;

        server_name de.somewhere.com;

...
}
Now we can point nginx away from the default to the new configuration file.
We delete the symbolic link in sites-enabled, not the original file in sites-available
first get the name of the link.
From the resource “https://blog.logrocket.com/how-to-run-node-js-server-nginx/”
you@de:~$ ls -l /etc/nginx/sites-enabled/
total 0
lrwxrwxrwx 1 root root 34 Aug 29 08:28 default -> /etc/nginx/sites-available/default
you@de:~$ ls -l /etc/nginx/sites-enabled/default
lrwxrwxrwx 1 root root 34 Aug 29 08:28 /etc/nginx/sites-enabled/default -> /etc/nginx/sites-available/default
you@de:~$ sudo unlink /etc/nginx/sites-enabled/default
you@de:~$ ls -l /etc/nginx/sites-enabled/
total 0
you@de:~$
Enable the desired configuration file by creating a symlink (symbolic) link from it to the sites-enabled directory, which Nginx reads from at startup.
you@de:~$ ls -l /etc/nginx/sites-available/
total 8
-rw-r--r-- 1 root root 2815 Jan 27 09:01 default
-rw-r--r-- 1 root root 2817 Jan 18 22:56 with-ssl.conf
you@de:~$ sudo ln -s /etc/nginx/sites-available/with-ssl.conf /etc/nginx/sites-enabled/
you@de:~$ ls -l /etc/nginx/sites-enabled/
total 0
lrwxrwxrwx 1 root root 40 Jan 27 09:17 with-ssl.conf -> /etc/nginx/sites-available/with-ssl.conf
you@de:~$
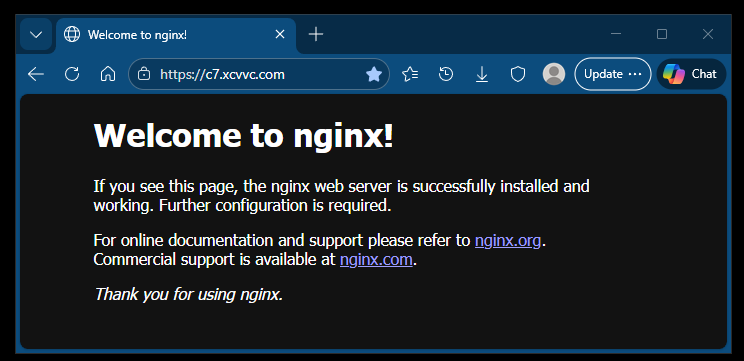
Restart NGINX
sudo nginx -t #test the configuration

you@de:~$ sudo nginx -t
nginx: the configuration file /etc/nginx/nginx.conf syntax is ok
nginx: configuration file /etc/nginx/nginx.conf test is successful
you@de:~$

sudo systemctl reload nginx #apply changes without downtime
sudo systemctl restart nginx #completely stops and then starts the nginx server, closing all existing connections.

sudo nginx -s reload   # fallback if systemctl is misssing
Service Management
Stop: sudo systemctl stop nginx
Restart: sudo systemctl restart nginx (useful for major changes)
Reload: sudo systemctl reload nginx (applies config changes without dropping connections)
Enable on Boot: sudo systemctl enable nginx
Site Blocks: /etc/nginx/sites-available/ (configs are stored here)
Active Sites: /etc/nginx/sites-enabled/ (symlink files here to activate them)
Web Root: /var/www/html/ (default location for your website files)
Logs: /var/log/nginx/access.log and /var/log/nginx/error.log